
My mother in law is coming for Christmas, and I have less than a week now to finish a quilt for the guest bed from scratch. I know, you will all think I am crazy (and maybe rightfully so, LOL), but I decided to do a Trip Around the World quilt for the guest bed in Christmas colors. Remember the Quick Christmas Project posted yesterday using the cylinder method of quilting? This technique is also used for this pattern on a larger scale. It was easier and faster than I thought it would be, and the picking out of some seams didn’t create rips in the fabric. So now, the goal is to get one done before she arrives. I have all this Christmas fabric to use up, and this seems like a fast way to make a festive accent for the room. So, what do you think of these fabrics?
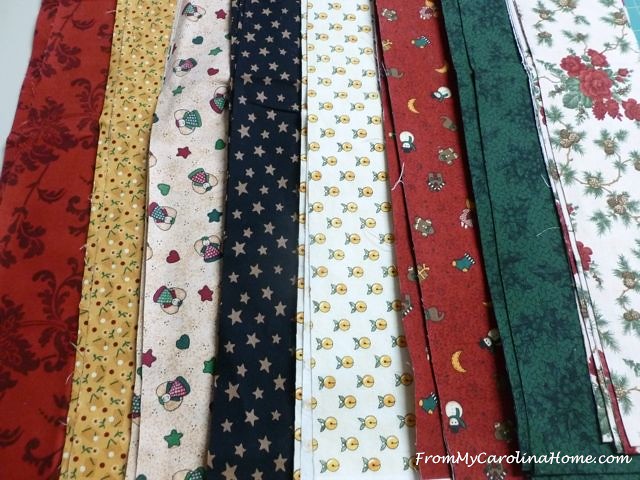
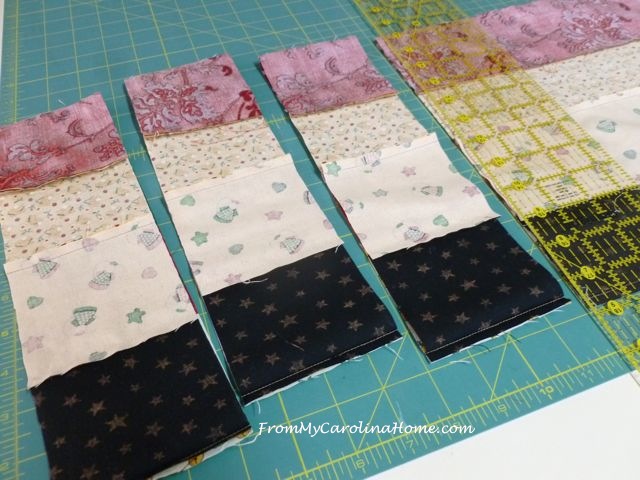
Trip Around the World is a classic pattern for quilts. I started the piecing last weekend, and if I can get busy this week, I just might get it fully quilted and bound before she arrives. That’s the goal! I started with 3-1/2-inch wide strips of my chosen fabrics because I wanted a larger quilt. Jelly roll strips might do well here if you have enough of each color. I cut all the strips, then made notes as to the order of the prints (numbering them one to eight) so I could sit and sew strips chain style. I used four strips of each color, sewn together in the same order to make four strip sets.

I pressed toward the even numbered strips. This will make nesting seams easier.

Then complete the tubes by sewing the long ends together.

They won’t all be the same length, but that will not matter.

Now, take a deep breath, and cross cut the tubes into square-strip sets. Use the same width as your original strips. For mine, this was 3-1/2 inches, for a jelly roll it would be 2-1/2 inches.
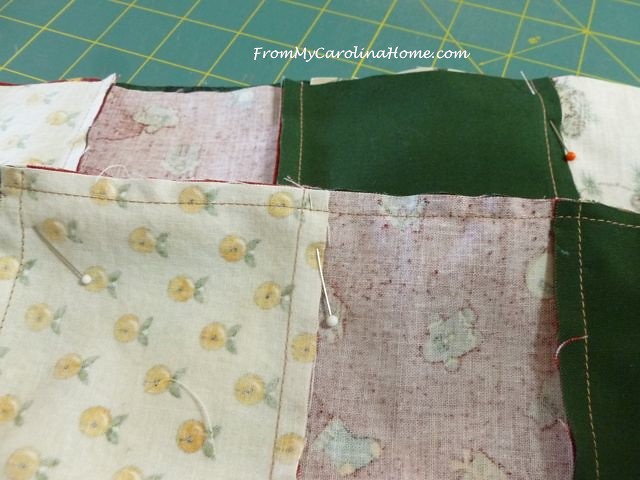
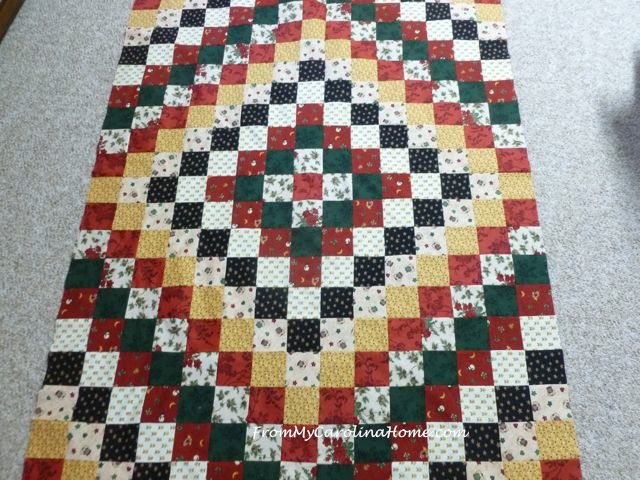
I started taking out seam lines between specific squares to start the pattern. First was to separate #1 from #8.
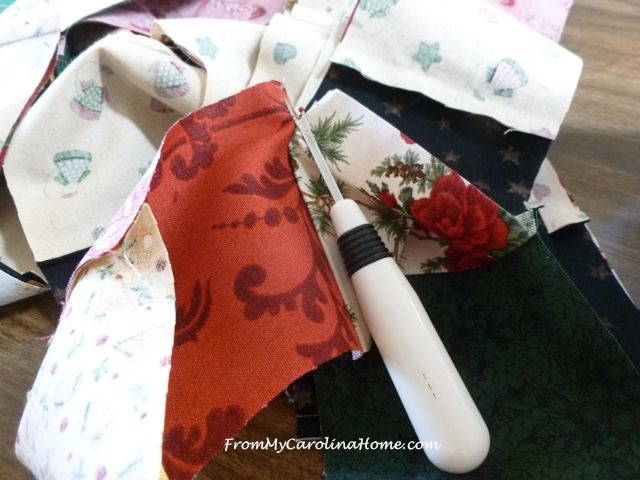
Then #2 from #1

Sew those together. See how the squares offset by one?
Unpick the next one one square over.

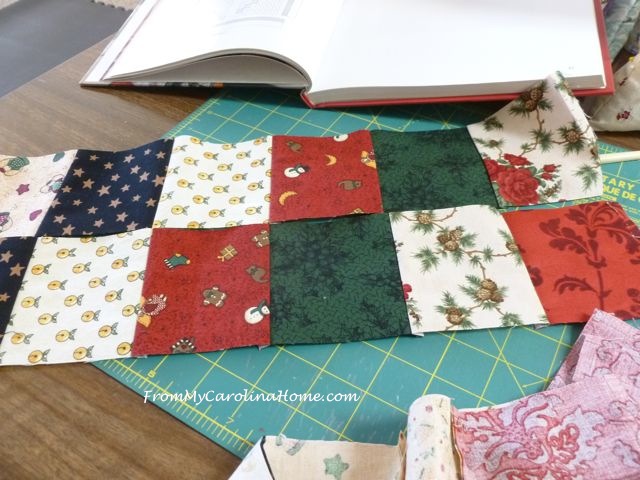
Continuing on, constructing the upper left area first.

I discovered a time saver, leave the pins in after you sew the row, and just move them up to the next row. Saves time taking them out, putting them back in the pincushion and then picking them up again.
On the lower half, the squares go the other direction.
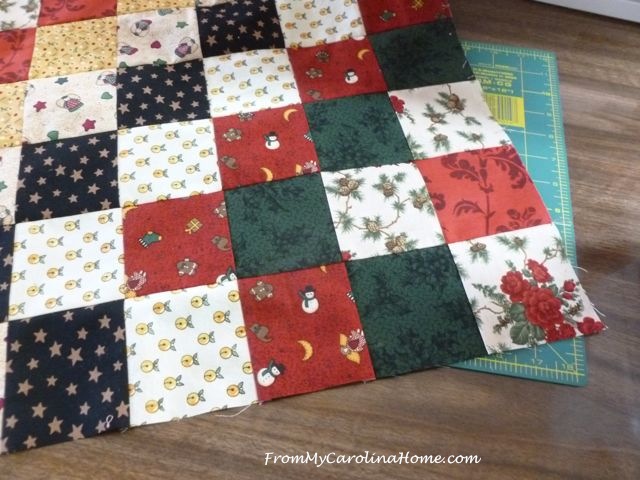
Left side done!
The right side of the pattern used only seven of the eight squares. Here’s most of the right side. Still only a few rows to go! You can see a little star post-it note I used to keep me reminded of which end was the top. There’s one on the other side too.
 <
<
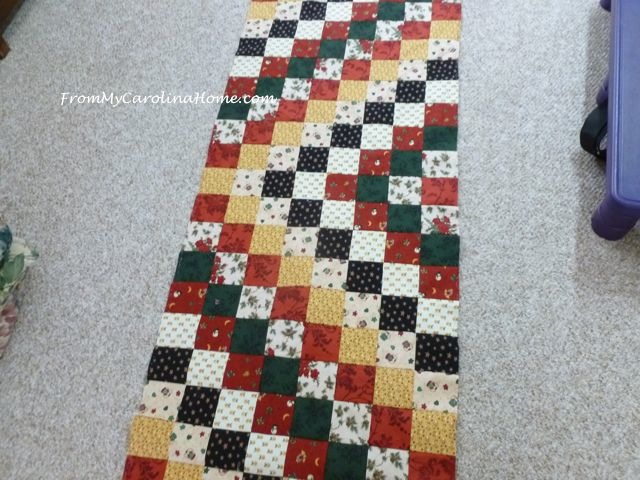
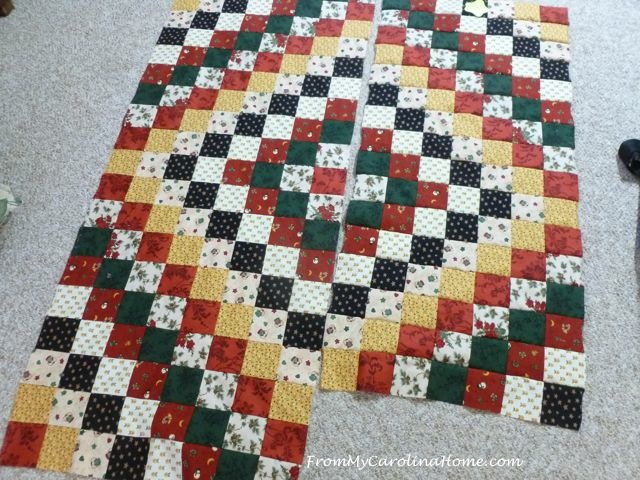
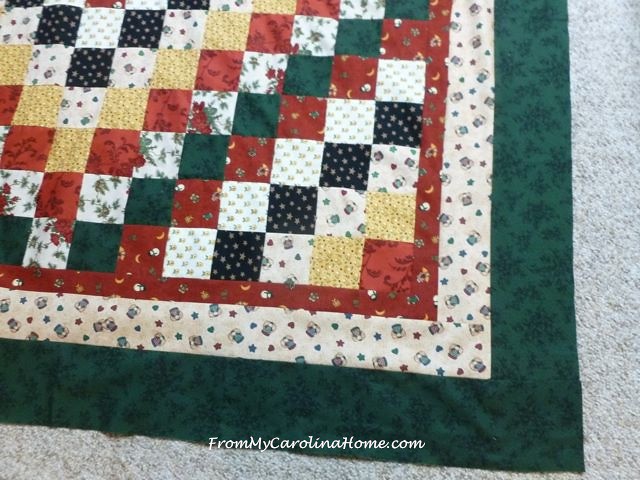
I pressed the left side seams between the rows towards the top. The right side seams were pressed toward the bottom, so they would nest with the other side. Piecing done on the squares portion. Now for some borders.
The first border is the red print. Measured as per the standard way, and applied.
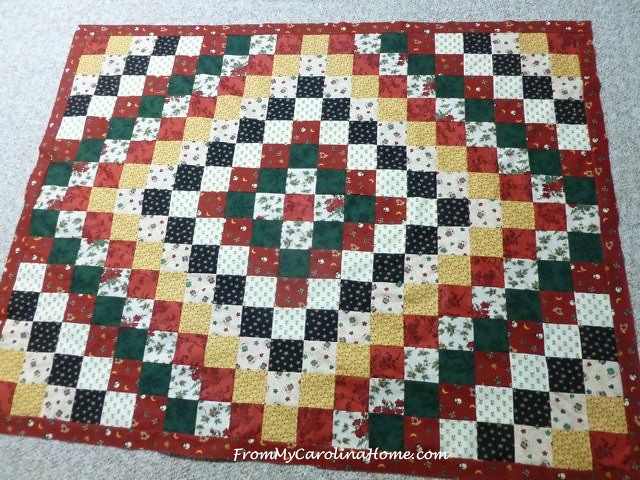
Sometimes I use the longarm rail to do the measuring and pinning. Two more borders in cream and deep green.
I like this quilt more and more every time I add the next element.
Here’s a close up of the corner.
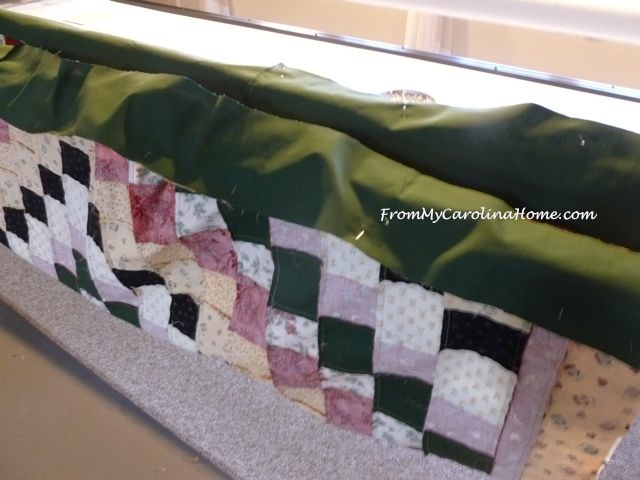
Now, loaded onto the frame for quilting, I’ll work on quilting a little each day.
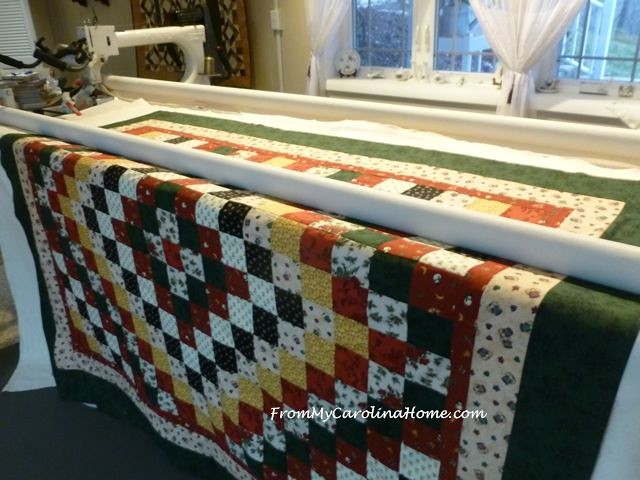
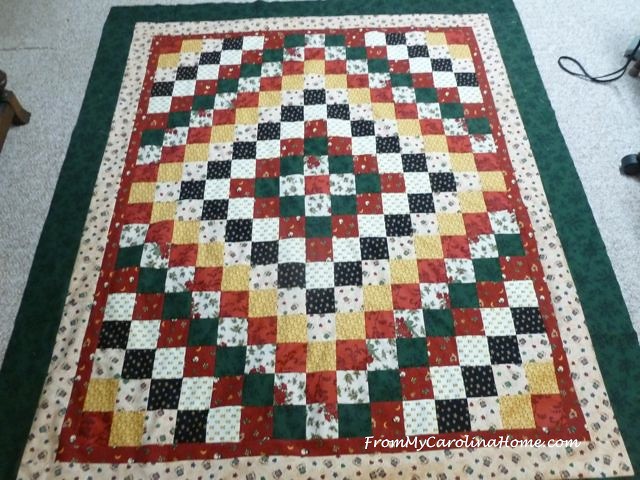
It took two and a half days to get to this point. If I can finish quilting on Saturday, and bind it on Sunday, I’ll have it on the bed with days to spare! But likely, I’ll still be doing the handwork up to the day she arrives which is Wednesday, Dec 16th. Wish me luck!
If you are visiting from a linky party or Fave Quilts, welcome! Please stay a bit and look around, I have lots of tutorials and projects, and sometimes giveaways too. Click on the Home page to see the latest posts and projects. I love new followers too! There are project, basics and recipe tabs at the top, and categories on the sidebar so you can see the wide variety of subjects on this blog.
See the finish – HERE
Fat Quarter Shop December Basic of the Month is Riley Blake Ginghams! Thank you for using my affiliate links.

Your Christmas Trip Around the World is beautiful.
Looks beautiful, Carole. That is a great technique, and labeling all the rows, etc is so helpful!
Will your MIL take the quilt home with her? It is beautiful and you are amazing to get it done so quickly. Congratulations!!!!!
It looks great! Keep up the good work, you’ll be finished in no time! I’ve often thought it would be awesome to have a Christmasy quilt on every bed…
It’s even easier and a slightly different look if you only stagger them HALF, ala Eleanor Burns: no matching seams to worry about! she cuts the seam off at one, and through half at the next. I used it for a baby almost twin size quilt, started out as a trip, but mine ended up making a somehow long and skinny medallion (don’t ask!) so I took it apart in a couple of places and made it bargello, lovely… had aqua, white, grey, a clear red and some gold from a random jelly roll I had bought. With a beautiful water color aqua backing I bought on sale from Craftsy, voila! Trip quilts and jelly roll race track quilts are fun and fast. You are so creative and I can’t believe how fast you are! I’ll send you the picture…
Absolutely beautiful. It would take me a lot longer to get to the point you are at.
Carole, This is a beautiful Christmas Quilt! I am sure that you will have it finished by the time your Mother-In-Law arrives. After reading the other comments, I think I will give Sharon Schippers suggestion a try; it would create a different effect in the same method, is what my mind is thinking. Yet, LOL, by the time I get my other Christmas projects done, most likely it will be time to begin your next Mystery Quilt Along. LOL. So who knows. But sure would like to try this one out. Have a wonderful creative day! It is raining big time here today, so another perfect day for sewing! Thank You for sharing your beautiful quilt and have fun quilting it!
I’m wishing you luck! You’re braver than I am to start this so close to Christmas. Beautiful job!
You go, girl – you can do it!!!!
Wow, you have been SO productive. And the projects all look great, love that trip around the world. I’ve finished my runner – enjoyed the process thanks for that.
I love your Christmas quilt. It was fun to see it grow with your excellent photos. I was amused at my reaction to the shot showing the borders. My eyes got big as the quilt seemed to pop out at me. Fantastic!
Wishing you much luck and love – your Mother in law will be impressed as are we! Where’s the sherry you deserve one!
Wren x
It’s beautiful and I have no doubt that you will have it done 🙂
That looks exactly like the method I used to make a bargello quilt. Do you think your mom would be willing to do a little stitching on the binding while she’s laying in bed? LOL! It is gorgeous.
What a beautiful quilt! I would never be speedy enough to get a quilt done on such short notice, especially at Christmas time. Your mother-in-law will love it!
Lovely quilt!
I just thought I mention that I don’t rip the seams like you (and probably most people) do. I use the seam ripper to cut the thread on one side of the sewn piece at intervals. Then I loosen the thread on the other side of the piece and pull it out. This way there is no risk of ripping into the fabric with my seam ripper and, because I pull out one of the threads in its entirety, there are fewer little bits of thread to remove.
Wow, I am in awe!!! Did you sleep this week?? I agree with others, it is beautiful, and at your pace I have no doubt you will be finished. Check MIL’s suitcase when she departs……
WOW….this is amazing. “Oh my MIL is coming ; I’ll just whip up a little something” LOL!!!!
Wow!!!! You stayed on track really really well! usually when a deadline looms I need to clean the house lol
unbelievable! That is just amazing. LeeAnna
Wow!!! Beautiful quilt and you are so fast! Love the Around the World design, I did it as one of my first quilts….many, many years ago!
You make it seem so easy. I love how the fabrics blended so well together.
Re this quilt, could I ask you a question via email? Thanks!
I would love to make this quilt in a queen size. Is there a way to calculate the amount of each fabric I need?
Well, you would determine the finished size of your squares, then add 1/2 inch to that measurement for seam allowance. Divide your WOF strip by that measurement to see how many squares you can get from one strip. Figure the total squares by the size you want to make, then decide how many colors you want. Then you can figure the number of strips you need, and from that the total yardage of each one. It is tedious, but just a matter of putting pencil to paper, and using a calculator. EQ7 would make it easier if you have that program, you can tell it what you want and it will figure the yardage by color for you. Since I had no size in mind, I just sewed the strips and created the center, adding borders to get it a bit larger.
Beautiful, I love it. But, What is the order of all your strips? I have done couple of Bargello’s, so I am confused – which is easy to do LOL. What happens to strip number 8 when doing the right hand side? Do I still stitch the 8 strips together? I already have 2 1/2 ” strips cut so will be using those. But should be ok right? I am already to start working on one to have for Christmas this year (2018) am sure I will get it done, since have a whole year to do it. Am not as fast as you – as you are toooo brave for me. Thank you for your help.