
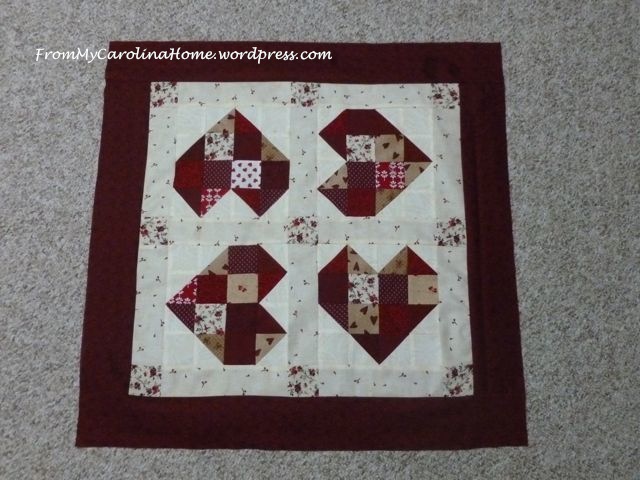
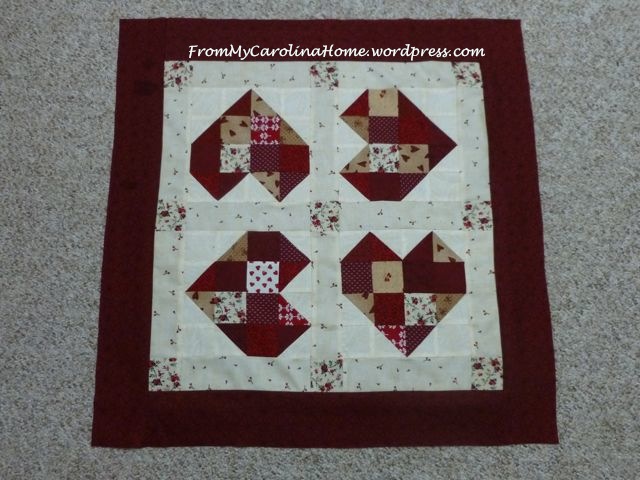
Scrappy reds are so pretty, and I really like these fabrics with their burgundy and cream colors. What better motif for scrappy reds than hearts? This table topper with its hearts facing different ways makes a wonderful centerpiece and everyone has the same view. Its finished size is about 28 inches square.
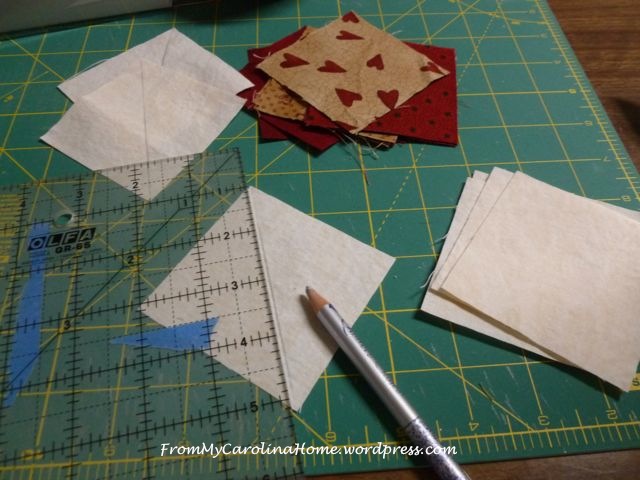
Start by cutting your pieces, here’s what you need.
Scrappy Reds
24 2-1/2-inch squares
16 2-7/8-inch squares
Background Ecru
16 2-7/8-inch squares
8 2-1/2-inch squares
Sashing and Cornerstones
9 2-1/2-inch red print cornerstone squares
12 strips 2-1/2 inches x 8-1/2 inches ecru with sparse red print
Border
1/2 yard red fabric cut into 3-1/2 inch wide strips
Draw a diagonal line on the back of your 2-7/8-inch background squares.
Pair them up with the 2-7/8-inch scrappy reds and sew 1/4 inch away from the line on both sides.
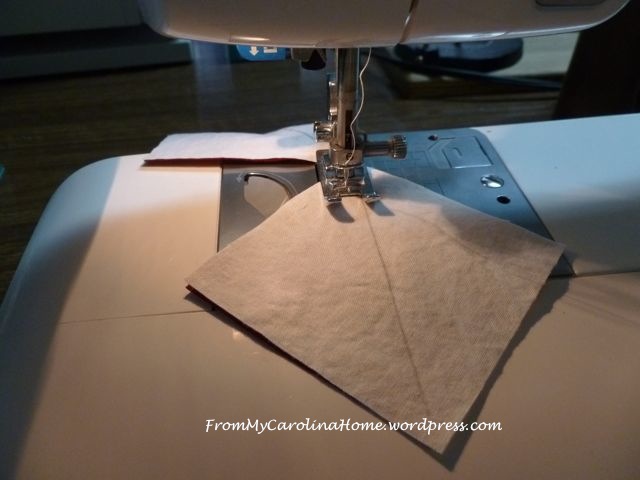
Chain stitch both ways.

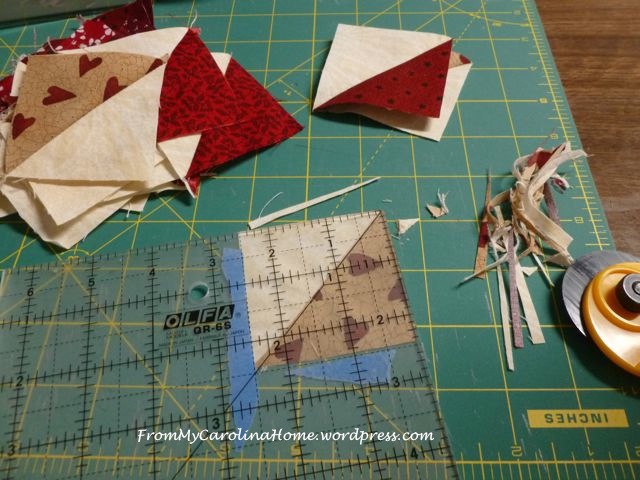
Cut on the line, press to the red side, and Square Up to 2-1/2 inches.
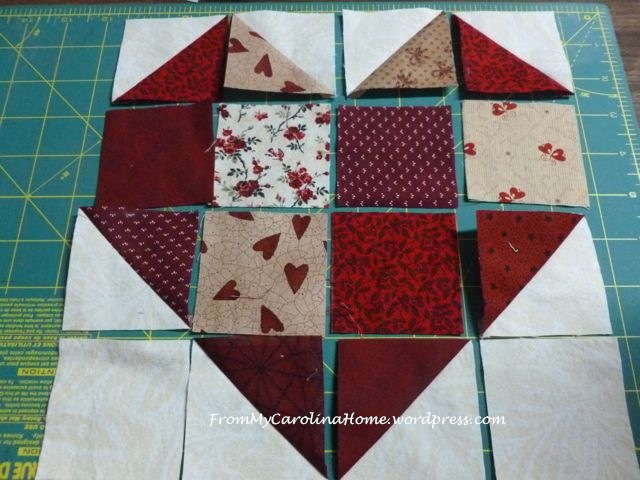
Now, lay out groups for each heart so you end up nice and scrappy. You’ll need six red squares, two background squares, and eight HSTs for each one.

Lay out each heart one at a time, making sure you have the prints distributed nicely.
Sew in rows.
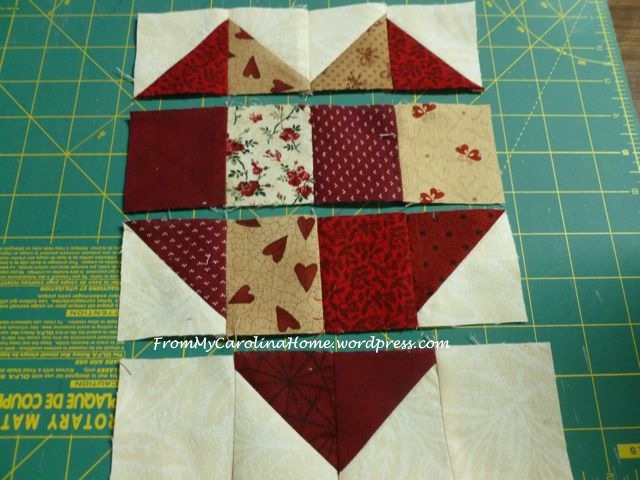
Press each row with seams going in opposite directions from the row above to nest the seams.
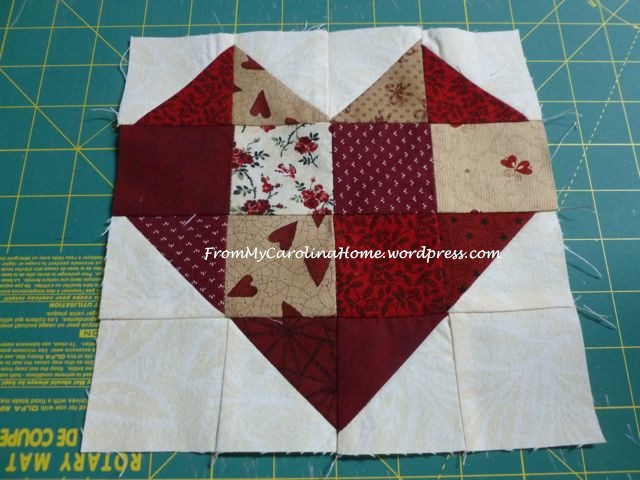
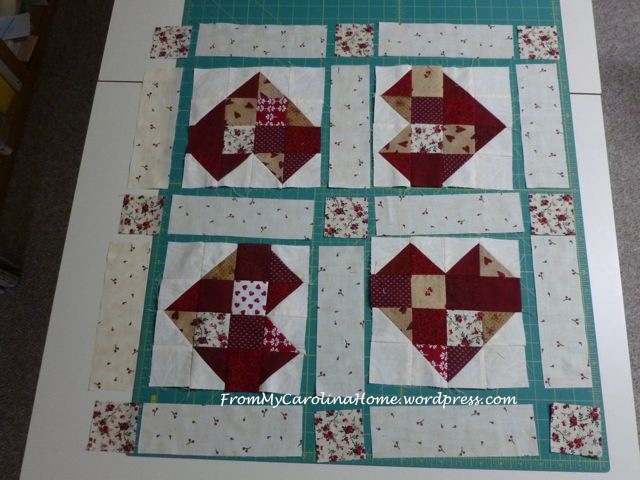
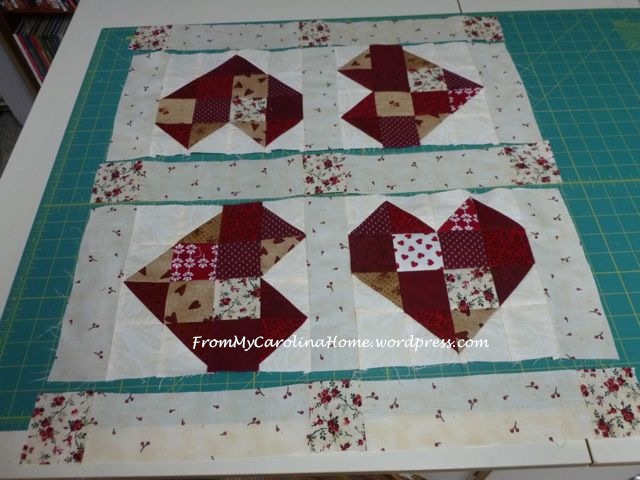
Repeat for the next three blocks. The hearts should measure 8-1/2 inches square. Lay out the blocks with the hearts facing all four directions. Here’s the layout.

The bottom right will be upright, then the bottom left will face left, the upper left will face up, and the upper right will face right. Place your cornerstone squares and sashing strips. Note that each sashing strip has been cut to measurement, just like you do a border. This will keep the quilt flat and prevent those C- and D-cups that form in the middle from sashing that is too long. See my tutorial on Quilt Borders Understanding the Why to see how measuring makes a difference. For even more information, see my post Another Lesson on Measuring Borders.
Sew in rows, making sure you sew with the patchwork up to be sure you sew through the ‘x’ at the points.

Chain stitch here too.
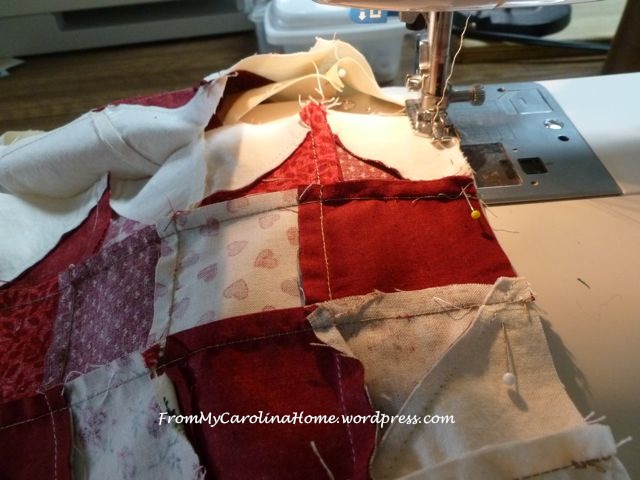
Press towards the cornerstones and towards the patchwork hearts. This will do two things, it will nest the seams for the rows to join, and it will keep the stronger red color from being seen under the lighter sashing strips when it is quilted.
Add a dark red border 3-1/2 inches wide, using the Measure and Cut Border Technique.
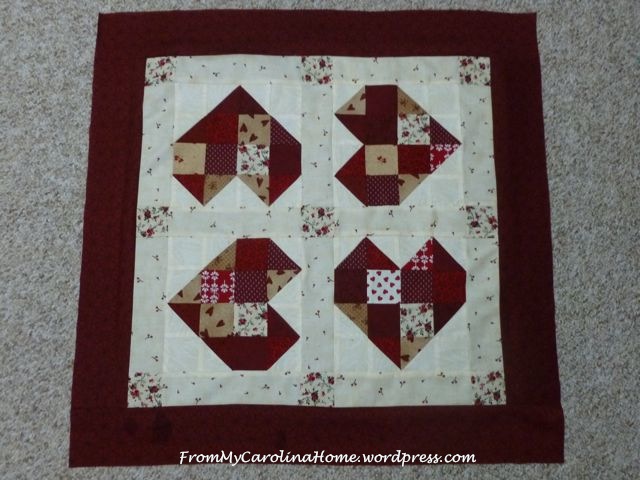
Quilt as desired and bind as usual.
Enjoy! It took a while to get the quilting done, see Quilting Hearts Around for the finish.
My blog is a variety of subjects, quilting and sewing, tablescapes and recipes, book reviews and hand stitching, crafting and mountain living. I love to have new followers, too! See the buttons on the sidebar to follow by your favorite method. If you are visiting from Fave Quilts, All Free Sewing, Pinterest, a link up site, or just found me, please stay a bit and have a look around, my tutorials are gathered at the top in pages to make them easy to find. Lots of fun is had here, and I invite you to follow with any of your favorite methods, see the sidebar for ways to follow. My third mystery quilt is in progress, click on Scrap Dance Two Step on the sidebar for the first post. Click on the Home page to see the latest posts on the blog.
What are you working on this week?
 New Precuts on Sale this week!
I am a FQS and Amazon affiliate, and may earn a small commission to support the costs of the blog from any purchases you make. You can use your existing accounts, and there is no cost to you. Thank you for using my links when you can!

I like the way your rotated the hearts so there is no up or down. That heart block is cute and fun!
I’ve always seen that called the “Chase” pattern, thus this is the “Chasing Hearts”. I knew it had to be fab!
Love the hearts thanks so much . Will get started on one for my coffee table , when I finish the laundry.
This is darling Carole — and nice EQ design image too! Thank you so much for sharing. Karen
This is so cute!! It’s a great way to use the red scraps, too.
And thank you for the lovely tutorial! I want to make this before February!!
A lovely and different take on the 16-patch block! Thanks for sharing!
Thank you for the lovely tutorial. It’s a great way to use up the scraps we all seem to accumulate.
Thanks for the tutorial! Great mini for Valentine’s Day or any other time really. Thanks for linking up to #scraptastictuesday
Wow this is beautiful, I would hate to cover it up, tfs!
Another beautiful creation, Carole! I was thinking maybe I would make one heart square and make a pot holder out of it…. that might be my afternoon project 🙂 Thank you so much for sharing at Roses of Inspiration. Hugs to you!
This is just darling.
Just Gorgeous, beautiful fabrics and such a pretty design!!
Pingback: Tutorial: Heart block table topper – Quilting
Great topper for Valentine’s Day!
Really cute Carole! I think mini’s are sew adorable! Thank you for linking up. xo jan
Lovely table topper. Thank you for sharing how to make this … 🙂 Pat
Fantastic little quilt!
Wonderful tutorial and just in time for Valentine’s Day. I saved it for when I have time.
Carole , this table topper really pulls at my heart strings! 😍 love your hearts.
I love your heart too!!! I forget home versatile HST can be. Thanks for rejuvinating this post at Tuesday Archives this week 🙂 🙂
What a great tutorial! The hearts going in different directions is wonderful!
Excellent tutorial Carole and what a neat wall hanging! Thanks for sharing.
Thank you for sharing in Tips and Tutorials Tuesday this week; it is timely for being just before Valentine’s Day!
Pingback: Tips and Tutorials #7 – Quilting Jetgirl
Great project! Like the rotation of the hearts!
Pingback: Tips and Tutorials Tuesday #7 – Quilting Jetgirl
Hi Carole! Oh thanks for rejuvenating this fun post at T.A this week. I love hearts!!!