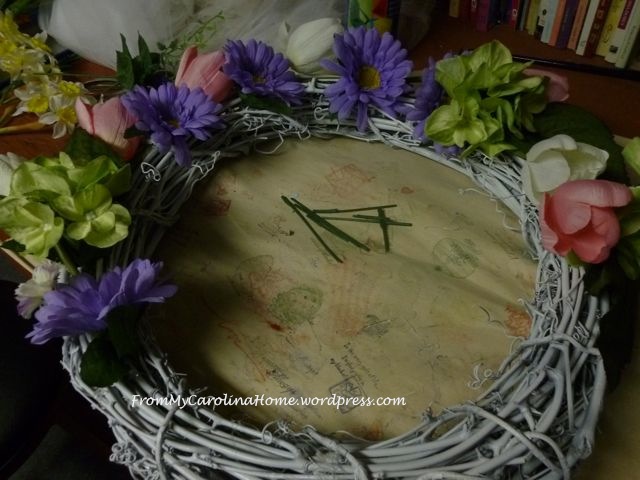
I am so ready for warmer weather and more flowers, so I decided to make a wreath for the front porch. I was inspired by several I found on Pinterest, but as usual, I have to do things my own way. While we are doing this, I’ll share my secret for deciding what to use in any arrangement. It might surprise you.
The first thing to do is get your wreath base, whatever you like to use. My favorite base is grapevines because they hold up almost forever, and can be taken apart and reused. This one has seen a few incarnations, so to freshen it up I spray painted it white.
The local craft store had a sale, and I picked up several floral clusters at 40% off. The tulips really looked like spring, so I got one in pink and one in white. I picked up a cluster with purple and yellow flowers, along with a cluster of jonquils in yellow and white. Sorry these pictures are a little dark, my workbench is in a room without windows.
Now, here is the secret. I use the rule of odd number of items, along with the Fibonacci number sequence to decide what to put on the arrangement. So, I want an odd number of items, different flowers and fill ins, and the Fibonacci numbers incorporated. For those not familiar with this, it is everywhere in nature, and makes a pleasing arrangement whether you are arranging flowers, or putting borders on quilts. The sequence is made by starting with 0 and 1, adding together the last two numbers to get the next one. So, 0-1-1-2-3-5-8-13 and so on.
As I was cutting the flowers apart on the purple flower grouping, I noticed it used this sequence too. There is one little bellflower stem, one miniature carnation, two dark purple flowers, three hydrangea and five light purple daisies on that one stem.
Begin by putting your largest items on first and work down to smaller. So, I cut five pink tulips and three white ones off their main stems and placed them on the wreath. Secure using hot glue.
Then add the purple daisies, as they were the next largest item. I used all five. Place the three hydrangeas. Cut off excess stems as you need to, going shorter with the smaller items.
Working down in size, I added the two little purple flowers, then filled in the holes with eight jonquil clusters. I like asymmetrical designs, so I put the flowers up and over the top, but left the lower right area uncovered. I made a small bow with a purple pansy ribbon I had in the stash.
Here it is hanging on the porch. Just now noticed that you can see the mountain valley reflected in the kitchen window. How cool is that!
Happy Spring!


Carole,
Loved the wreath. Wish you could send it here!
Mom
Thanks, Dear MIL!!
Maybe even I can do this. If I do, it will be a duplicate. I love these colors. Never used a hot glue gun. This should be a Sat Nt LIve moment. LOL
Sure you can!
How beautiful! Love the mountains showing in the window too. I could never arrange flowers…..I’ll have to try that formula. Thanks for sharing.
Freemotion by the River Linky Party Tuesday
I’m liking how you incorporated Fibonacci into this wreath! 🙂
Thanks, Fibonacci is applicable to so many creative endeavors!
Very pretty and perfect for your door.
Gorgeous arrangement and like the idea of coloring the wreath white for spring
Beautiful wreath and so perfect for spring! I love that you painted it white, it gave it such a brighter look. Thanks for sharing with Roses of Inspiration. Hugs!
HI Carole….this was a fun, springy post to rejuvenate…thanks for sharing!!
Your wreath is quite beautiful and I like that we see a part of the vine branches. The odd number rule is one I adhere to, so this was not surprising to me. But the Fibonnaci number sequence… that was surprising! lol
Your spring wreath is lovely. I love the bow, too. Thanks for sharing at Celebrating Spring Link Party. Pinning and sharing.