
Sewing the binding to the quilt is rather easy, just follow along the edge. The corners are tricky, but not too hard once you know the secret. Remember that quilting is based on accuracy and precision, and your binding should be that way too. See Part One on How to Make Bias Binding if you missed it. Or click on the Tutorials category on the right sidebar to see all my tutorials.

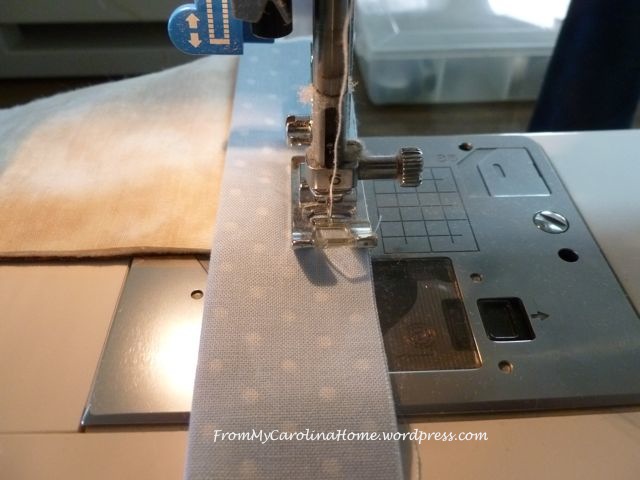
Begin by laying out your binding loosely on the quilt, do this on the floor if necessary. You want to be sure that where you start will not put a seam on a corner. Adjust it if needed. Begin sewing the binding onto the quilt top about 6-8 inches from the end. In other words, leave the end loose for now. You’ll see why this is important later.
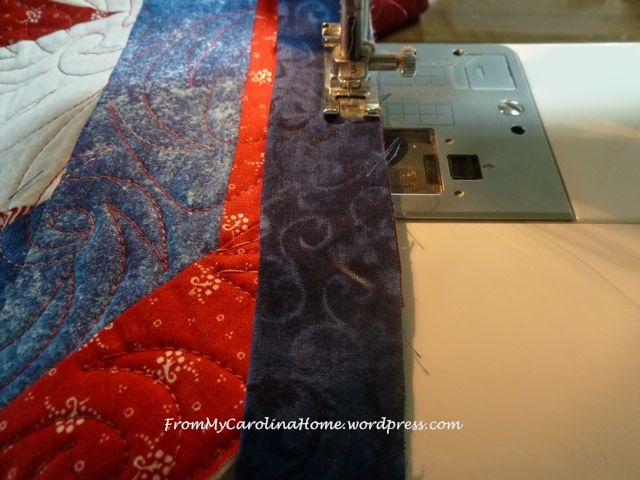
I use a presser foot that is almost 3/8 inch from the needle to the edge because I find that little bit extra in the first seam line makes a perfect amount for folding over. Some will use 1/4 inch, and if you do so, you might want to decrease the size of your strips to 2-1/4. I like a generous binding, so I use 2-1/2 inch strips and the 3/8 seam allowance. Decide which presser foot will suit your needs, and then start sewing the binding onto the quilt.

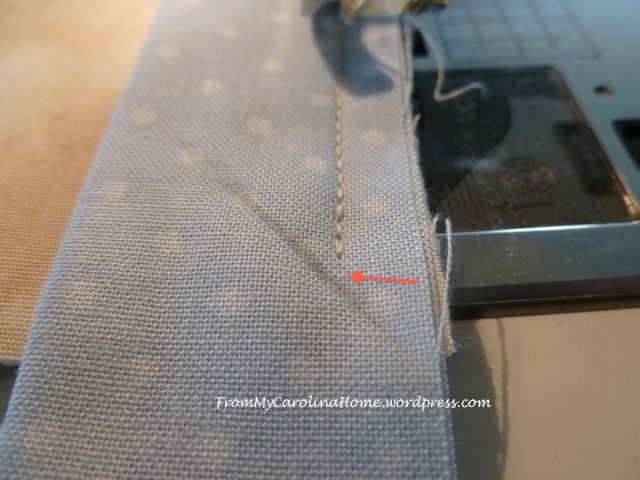
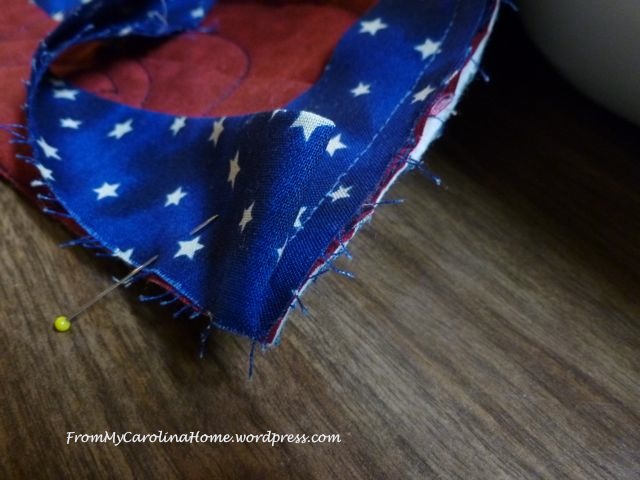
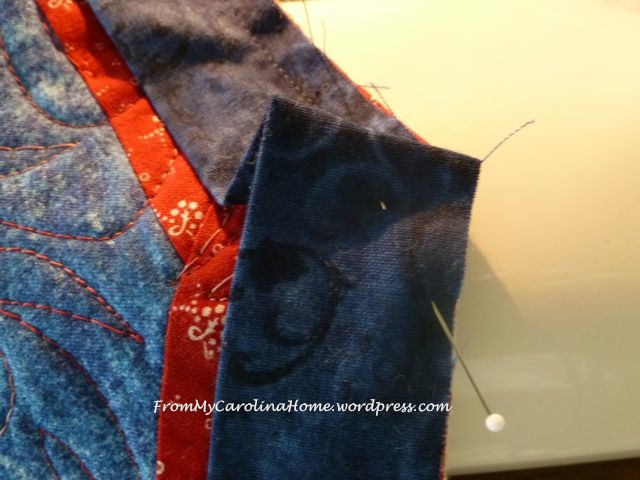
As you are coming close the the corner, stop sewing (needle down helps but isn’t required). Fold the fabric back over itself forming a 45 degree crease. The bottom edge of the quilt and the binding should be at the same level.

Finger press this crease hard. Be sure your edges line up so your crease is just right. You can see the faint line of the crease in this picture. The end of the crease should land precisely in the corner of the quilt.

To make it more obvious, I will sometimes go over it with a marking pencil.

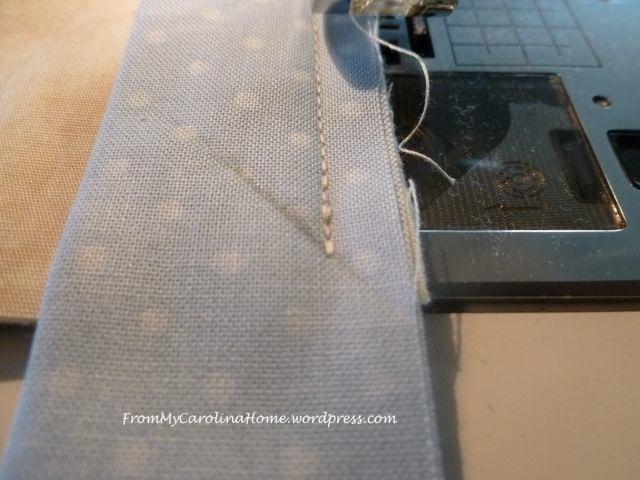
Now, sew up to the line, then backstitch two or three stitches to lock them.
Check to be sure you got it precisely on the line.
Nope, needs another stitch or two.
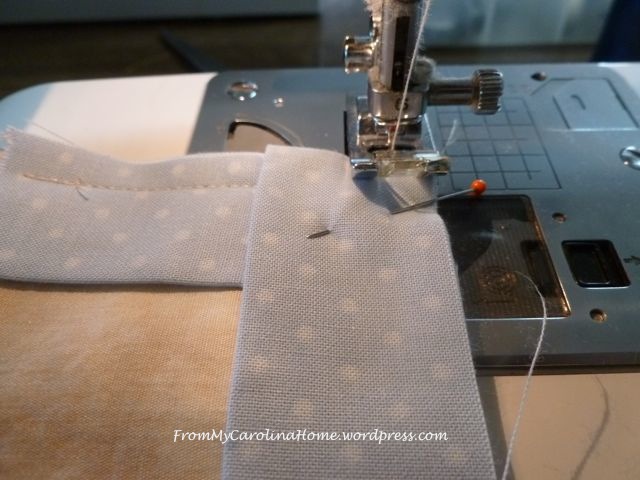
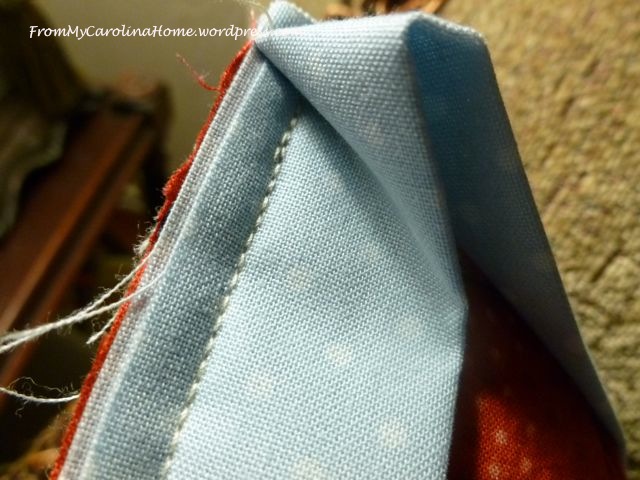
OK, that’s perfect. Now, fold the fabric up and over itself again along that creased line, then back along the bottom edge of the quilt. Line the fold up with the edge you just sewed. This is very important to making that perfect miter. You don’t want too much or not enough fabric in that corner, accuracy pays off, so do this carefully.

Begin sewing at the edge of the fabric.

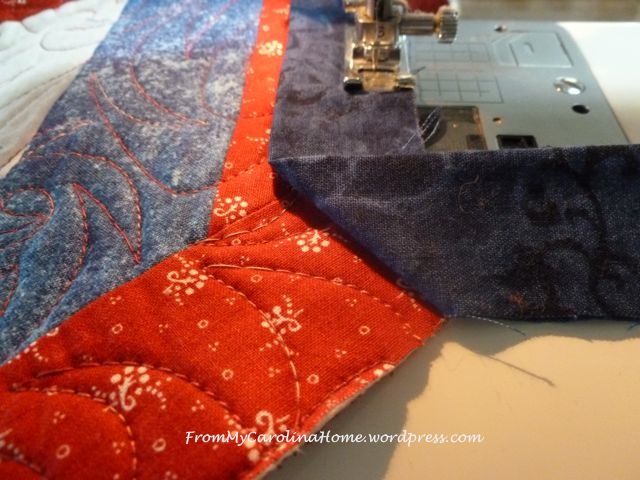
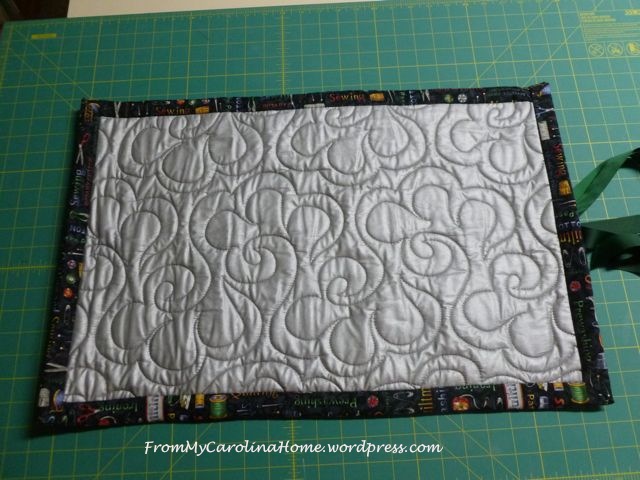
Here’s a couple more pictures of that corner, and a few more corners on this quilt and a QOV quilt.


Continue around the whole quilt, stopping when there is 6-8 inches of binding left at the end, and an unsewn area on the quilt of 8-10 inches.

The procedure is the same for 60 degree angles and 90 degree angles.
It works no matter what size binding you use. This portable ironing mat has a binding of 1-1/2 inches finished width, and started with strips 6 inches wide!
The application of a binding is so important that it can mean the difference between winning a ribbon in a show and not winning. Judges look for three main things in a binding. First, the binding must be full of batting, no spots where there wasn’t enough. Second, the corners must be perfectly mitered on both sides. Lastly, the joining point must not be apparent. No tucking one end into the other. The seam must be the same as any other seam in the binding, with no puckers or pleats.
Even if you never enter a quilt into competition, a well sewn binding will provide the perfect finish to your work. In part three, I’ll show you how to join the ends of the binding so no one will be able to tell which seam was the last one. Part four will take you through hand whipping the binding onto the back and making those perfect mitered corners on both sides.
Part Three – Joining the Binding Ends
Happy Quilting!

Thank you very much, now I learned something new. Just waiting for next step.
That is a great tip – folding the corner on the diagonal to show the stitch up to line! Your tutorial is sure to come in handy!
Great binding tips!
Thanks so much for linking up to Needle and Thread Thursday!
🙂 Kelly @ My Quilt Infatuation
thanks so much for sending me the link to this tutorial. I hadn’t seen the folding at the corner tip. I’ll give it a go ! I laughed at the “No tucking one end into the other., as I did that on my hot pad project recently posted on my blog – busted !
I need more practice, but slowly but surely I’m getting it. Thanks Carole.