
Binding a quilt is easy, and enjoyable. I like to have some hand work to do in the evenings, and whipping a binding down is one of my favorite things to do. I know, I am nuts. For those who are newer quilters, I am going to do a multi-part tutorial on bindings. It has to be in parts because I took so many pictures to show the whole process.

Today we will start by making the binding. In future tutorials we will attach the binding to the quilt making perfect mitered corners, then we will cover joining the ends so that it looks like any other seam in the binding and eliminates the bulk. Lastly, we will cover the hand sewing to the back of the quilt, making the corners mitered and sharp.
Begin by cutting bias strips 2-1/2 inches wide. To do this you have to find the bias, which is a 45 degree angle from the selvedge edge. This is pretty easy. There is a fold method where you fold back the side of the fabric to meet the selvedge edge and press in a crease. Then cut on the crease, and then cut strips from that edge. Using the 45 degree angle on your cutting board is helpful too, if you can line up your selvedge on a straight line, then cut using the angled line – just be sure you use the 45 degree line and not a 60 degree line.


But, most of the time I don’t have a huge piece of fabric to cut. So, I figured out that I already had the tools to make a bias strip with my square-up ruler. Place the diagonal line on your square ruler on the selvedge edge. The edge of the ruler is now at a 45 degree angle across your fabric. Place your long cutting ruler against the edge of the square ruler and cut.
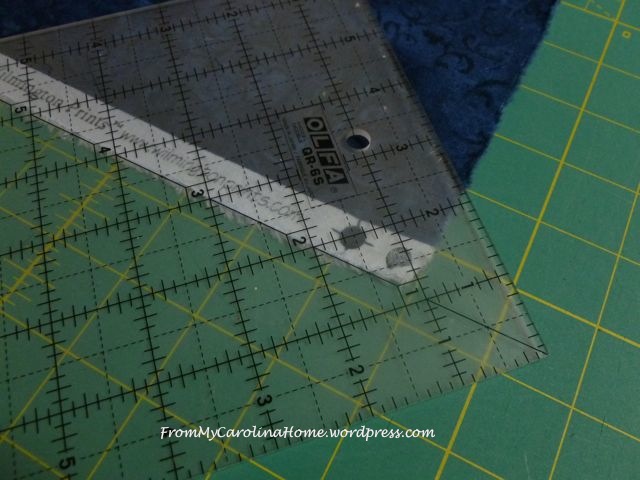
There’s your proper angle bias.

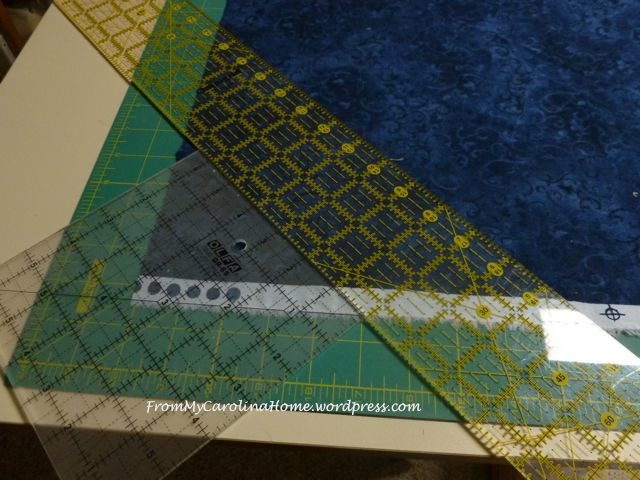
Now use that edge to measure out 2-1/2 inch strips.
You’ll note that the edges will be angled. Guess what, now they are perfect to line up for making the long continuous strip you need for a whole quilt. Just offset them and sew a 1/4 inch seam between the overlap points.

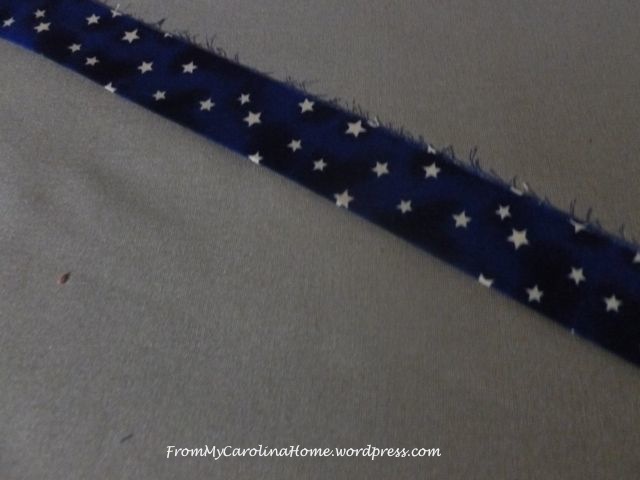
Sew the strips together end to end to make a bias strip that is at least 8 inches longer than the measurement of your quilt’s perimeter. Press the seams open. Then press the strip in half lengthwise. Yes, I did switch colors on you, I have lots of pictures, taken over several binding projects.

You may ask, why not use the straight of grain? It uses less fabric and gets longer strips. The answer is, you can. It depends on what purpose the quilt will have. A wall hanging that doesn’t get a lot of handling can easily use straight grain binding. But if you are going to use and handle the quilt a lot, like on a bed, given to a charity, or a baby quilt, the bias edge will hold up better and longer. The reason is because the threads in the fabric will wrap around the edge both ways. On a straight grain, you will end up with the same thread going down the edge the length of the strip, leaving it exposed to more stress and therefore will wear out faster, particularly in quilts that are washed a lot. There are also times where you need the flexibility of the stretch in bias, such as a scalloped edge. Either way, it is good to know how to make bias binding for those times you really need it.

Great tutorial! Well laid out and easy to follow! Thank you!
Thank you, Lorna!
Great tutorial, Thank you for sharing.
Thank you for a great tutorial don’t get out with the girls when we have guild meeting I take care of my mother