
One of the comments on my tutorial on borders was a question on how to miter with prints. Luckily, the question came at a good time when I had just had two of my friends over to help me do just that. I still had some of the fabric, and I could take some close up pictures to illustrate the process. Many thanks to my friends, Velma and Donna, the mitering experts! I learned this process from them, and now can share it with all of you.

To begin, you need to measure the quilt in three places, just like we did for a plain, straight sewn border. Then you need to figure out the total width of your border. In this case, the quilt was 48 inches, and the border was 14 inches wide. Add the quilt measurement plus three times the border width measurement for seam allowance and overlap. 48 + (3 x 14) = 90. Cut your border pieces this length, joining pieces together where needed to get the total length.
Now, find the center of your border. Measure out half the quilt top measurement minus 1/4 inch (23 3/4 inches in this case) from the center of the border and put pins in at that measurement on each side. In other words, you are centering the quilt top on the border. Mark the quilt top with a pin at ¼ inch in from each edge. Match the pins on your border to the middle and end pins on the quilt, then pin the rest of the border in place.


Sew right sides together, leaving ¼ inch free at each end. Do the same on all four sides.

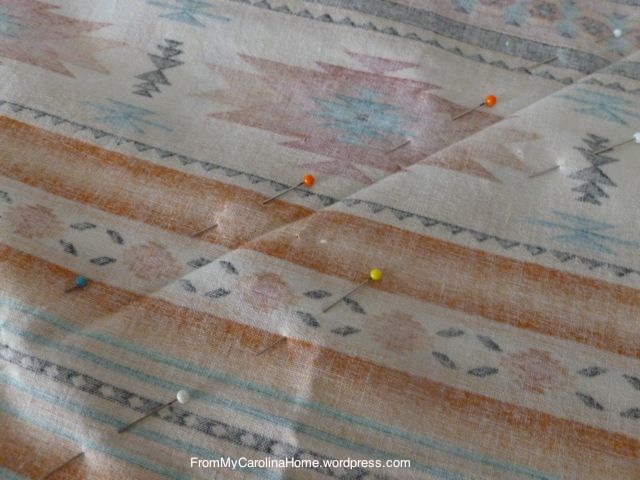
Lay the quilt out and look at your first corner. Overlap the border pieces, then fold one under creating a 45 degree angle.

Work it to match up the print as best as you can. Some things just will not be perfect, but don’t sweat the small stuff. Pin the folded border in place. In this example, I have matched the striped lines and not worried too much with the motif in the large area.

Take it to the ironing board and press in the seam line.

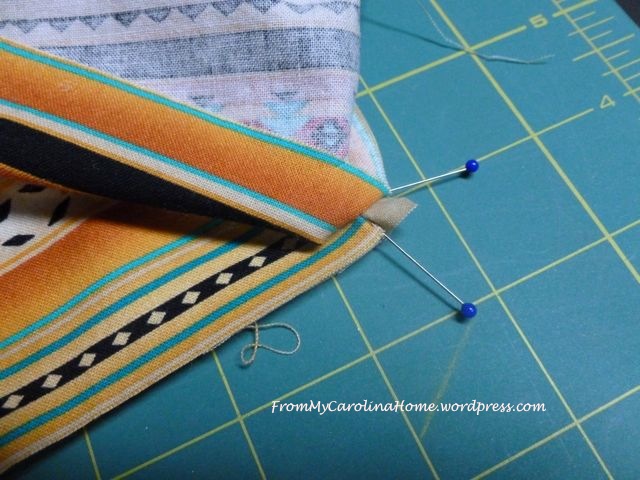
Carefully, lift an edge and pin the tails to stabilize the position of the borders in relation to each other. Carefully, take out the pins on the top side, open it up and pin on both sides of the crease.

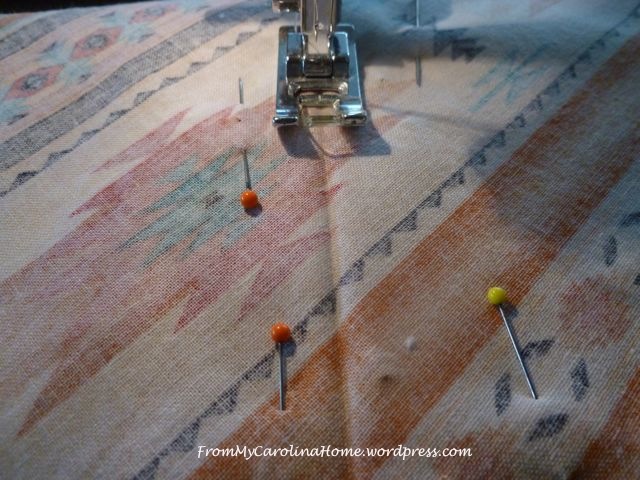
Sew on the crease starting ¼ inch away from the corner.
Flip it back to check it, be sure you are satisfied before you trim it off. Press seam open. You may need to add a hand stitch at the top of the seam where those unstitched 1/4 inch allowances come together to make it lie flat and perfect, but most of the time it will lie beautifully and quilt flat. Here is that corner bit, the beige is the quilt top, you cannot even tell where the unstitched 1/4 inch at the top of the border is as it lays flat under the border.
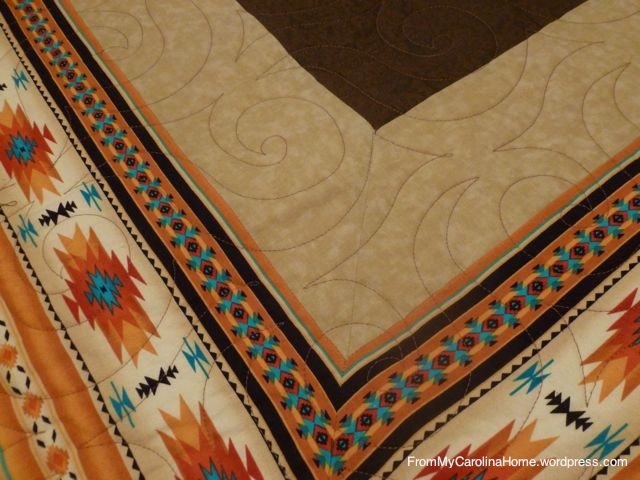
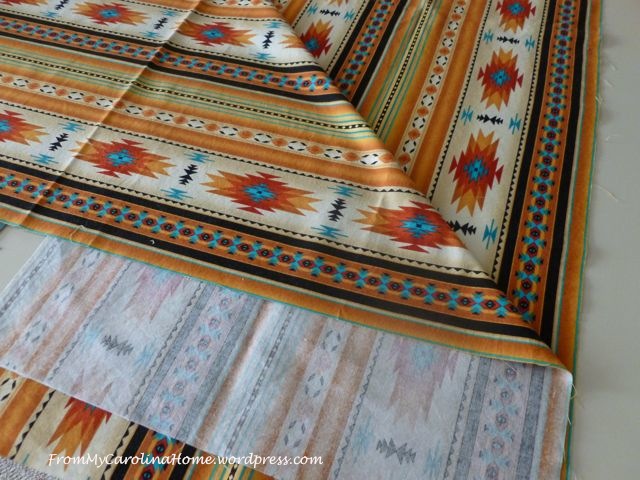
Here are a couple of corners from the finished quilt. Note that not all the motifs are perfect, but at a distance it won’t make a difference. The main thing here is that all those stripes line up.


If you were really trying to make a perfect miter with a print that didn’t have a strong stripe, you would do the same things but one corner at a time. You wouldn’t cut all your borders at once, only the first one with the measurements as discussed. The others will need a bit more fabric than the formula to pattern match. In other words, sew one border, measure and figure out how much extra you would need to line up the motifs, then make your measurements for placing the pins from there. Then sew the second border, and do the steps to line up the motifs and miter the corner. Then move to the next corner, and figure your next border size and motif match. Understand that the last corner will probably not match.
I hope this makes it easier to understand how to get those prints to line up nicely. I welcome your comments! Please feel free to share this wherever you like, just give credit back to my blog. You might also be interested in the lesson on borders, understanding the why of doing them in a measured way. Borders, Understanding the Why. And, now that you have perfect borders, see the four part tutorial on Binding, from making Bias strips to finishing with invisible joining seams.
Please feel free to point others to this post that need some help with border mitering. Please do not copy any pictures or information. You may share the link on Pinterest, just credit the blog From My Carolina Home.
If you are new to my blog, I hope you will stay a while and look around. There is a lot here, sewing and quilting, crafting and gardening, mountain living and reading books, cooking and lots more. Thanks for visiting and happy quilting!

Sharing
Val’s Tuesday Archive – Mitered Corners

This may just give me the courage to try it. Thanks Carole
I have not read the whole thing, but I am going to try if for no other reason than I LOVE the material. Can you tell me the name and where you got it??
Thank you, Dianne!! It came from Etsy, a shop called Scizzors.
I must do it again. Just finished a centrepiece with the demo fabric. Reminds me of our stay in Arizona.
Rather than pin, I find it more accurate to apply a thin line of glue to the seam, then set with an iron. Then open and sew. I use this method also when matching up fabric repeats to make a “seamless” backing.
I’ll have to try that. The trick is just to get the angle right so the miter comes out smoothly with the lines going around where they should. I find pinning helps me line it up right, but the glue sure sounds better for holding it for sewing. Thanks for commenting.
Mitered borders especially with prints can be lots of extra planning. The results are full payment. Great to read your tutt.